Metrics & Alerts#
Arthur Metrics and Alerts offer a powerful framework for measuring, alerting on, and exploring your model performance. This walkthrough will explore these critical features in depth, introducing you to their usage and how to leverage them to get the most from your machine learning models.
Metrics#
Metrics are functions for measuring model performance. They might compare predicted values to ground truth, measure distributional shift, evaluate model fairness, surface explainability trends, track feature distributions, inference volumes, or anything else you can imagine. Metrics are a foundational part of evaluating and exploring your models, and Arthur’s powerful Metrics API gives you the defaults you need to hit the ground running as well as the flexiblity to define model performance however it best suits your business.
Arthur’s metrics are defined as template queries in our Query API format. These template queries are evaluated with your specified parameters, filters, and rollup. For example, when you’re viewing a Feature Drift chart in the UI, behind the scenes the Arthur dashboard is:
evaluating the Feature Drift metric for your model
specifying your selected Drift Metric parameter (e.g. “PSI”) and your specified Drift Attribute parameter(s) (e.g. “Age” and “FICO Score” input attributes)
specifying your selected timeframe as a filter over the “inference_timestamp” field
specifying your selected rollup of “day”, “hour”, etc. to determine the granularity of the graph (or “batch_id” for batch models)
Default Metrics#
Arthur creates many default metrics that are commonly used to evaluate model performance, and these are tailored for each model you create. For example, classification models will get metrics like Accuracy and F1 while regression models will use other evaluation functions like RMSE and Average Prediction. Tabular models will get univariate and multivariate drift metrics, while CV and NLP models will only get multivariate.
Fetching Metrics#
If you have the metric ID handy, you can send a GET request to /models/{model_id}/metrics/{metric_id}.
Otherwise, you can send a GET request to /models/{model_id}/metrics/ with certain filters.
expand- If set to"type"will return the type with each metric.default- If set to True will return only metrics that are automatically created by default for your model.type- MetricType to filter metric query with.metric_name- Metric name filter to use in metric search.attribute_name- Attribute name filter to use in metric search.
Query Request:
{
    "expand [Optional]": "type",
    "default [Optional]": "<bool> [bool]",
    "type [Optional]": "[model_output_metric|model_input_data_metric|model_performance_metric|model_data_drift_metric]",
    "metric_name [Optional]": "<metric_name> [string]",
    "attribute_name [Optional]": "<attribute> [string]"
}
If using the SDK, you may call the get_metrics() method from your Arthur model.
Evaluating Metrics#
You can evaluate you metrics by sending a POST request to /models/{model_id}/metrics/{metric_id}/result. The metric
evaluation endpoint makes it easy to get results for your metrics in a format that’s easy to digest and plot.
Query Request:
{
    "parameters [Optional]": "[object]",
    "group_by [Optional]": "[array<string>]",
    "filters [Optional]": "[array<object>]",
    "rollup [Optional]": "[MINUTE|HOUR|DAY|MONTH|YEAR|REFERENCE|BATCH_ID]"
}
The parameters object maps from parameter names to values, and you can specify multiple values in your request.
You’ll receive a list of metric result objects, one for each combination of parameters you specified.
The group_by array contains a list of attributes to group the results over. If you supply one or more attribute
names, your list of metric result objects will also be broken out for each value in each group you specified. For
categorical attributes, these groups will be the values in each category. For continuous attributes, they’ll be
bucketed into deciles.
The filters array contains a list of filters to apply to the data being evaluated, in the same format as our
Query Endpoint Filters.
The rollup specifies how to group the results. If you specify no rollup value a single result will be returned for
all the inference data matching any filters, similarly if you specify REFERENCE rollup a single result will be
returned for all the reference data matching any filters. Other rollup settings will group the results by the specified
value (e.g. by each hour or batch).
Example: Evaluating Drift#
For example, to evaluate Feature Drift for two attributes, for each month since the beginning of 2021 UTC, you could use the following query:
{
  "parameters": {
    "feature_attr": ["attr_1", "attr_2"]
  },
  "filters": [
    {
      "property": "inference_timestamp",
      "comparator": "gte",
      "value": "2021-01-01T00:00:00Z"
    }
  ],
  "rollup": "MONTH"
}
The result would look like this:
{
    "filters": [
        {
            "comparator": "gte",
            "property": "inference_timestamp",
            "value": "2021-01-01T00:00:00Z"
        }
    ],
    "name": "Feature Drift",
    "results": [
        {
            "name": "attr_1",
            "parameters": {
                "drift_metric": "PSI",
                "feature_attr": "attr_1"
            },
            "values": [
                {
                    "attr_1": 0.1,
                    "rollup": "2021-01-01T00:00:00Z"
                },
                {
                    "attr_1": 0.2,
                    "rollup": "2021-02-01T00:00:00Z"
                },
                "..."
            ]
        },
        {
            "name": "attr_2",
            "parameters": {
                "drift_metric": "PSI",
                "feature_attr": "attr_2"
            },
            "values": [
                {
                    "attr_1": 0.001,
                    "rollup": "2021-01-01T00:00:00Z"
                },
                {
                    "attr_1": 0.15,
                    "rollup": "2021-02-01T00:00:00Z"
                },
                "..."
            ]
        }
    ]
}
Each combination of parameters returns its own result: if we’d specified KLDivergence in addition to our PSI drift metric, we would have four result objects. Within each result object, we get back a list of values, each of which contains a map with two fields: the metric value and the rollup value.
Creating Custom Metrics#
You can define a custom metric for your model by sending a POST request to the dedicated metrics endpoint at
/models/{model_id}/metrics. See our API Reference
for the full specification. The basis of the metric is the template query, which should have the following properties:
The query should only return a single value. For example, the query should not return a row for each inference or time-series data or scores for multiple attributes.
The query should generally not include filters. You can define filters when evaluating a metric, so the definition should be general.
The query may include parameters, which are denoted by
{{ param_name }}template values in the query definition and have corresponding entries in theparametersfield on the metric definition.
The full JSON request body has this format:
{
    "name": "<metric_name> [string]",
    "query": "<query> [dict]",
    "endpoint": "<endpoint> [string]",
    "parameters": "<endpoint> [string]"
}
name- Name of the metric to create.query- Query which makes up the metric.endpoint- Endpoint determining class of metric. If not data drift query, then/models/{model_id}/inference/query, else/models/{model_id}/inference/data_driftparameters- Parameters included in the template query with details about their allowed and default values
If using the SDK, you may call the create_metric() method from your Arthur model.
Constructing the Metric#
Your query template should return a single value, which you can imagine as one point on a model peformance graph. A good way to start building your metric is by hardcoding your parameters with fixed values, and then templating in the values that you might want to adjust—such as attributes, thresholds, baseline values, or anything else.
While you’re building your template query out, you can test it against Arthur’s query endpoint if your plan suports it, or create your metric and tweak it as needed if your syntax is wrong or executing the metric identifies issues. You can update existing metrics using the Metric PUT Endpoint.
Example: Feature Drift#
For example, let’s reconstruct the Feature Drift metric that’s available by default in the Arthur platform. We can start with a basic drift metric:
{
    "endpoint": "/api/v3/models/[model-id]/inferences/query/data_drift",
    "name": "Custom Feature Drift",
    "query":
    {
        "base":
        {
            "source": "reference"
        },
        "metric": "PSI",
        "num_bins": 10,
        "properties":
        [
            "[MY_ATTR]"
        ],
        "target":
        {
            "source": "inference"
        }
    }
}
This will compare all inference data to all reference data. We should be able to create this metric, execute it, and get a meaningful result. With the creation response we’ll get back a Metric ID, which we can then use to update the metric. We’ll edit the query to use templated values, and add parameters for them:
{
    "query":
    {
        "base":
        {
            "source": "reference"
        },
        "metric": "{{ drift_metric }}",
        "num_bins": 10,
        "properties":
        [
            "{{ feature_attr }}"
        ],
        "target":
        {
            "source": "inference"
        }
    },
    "parameters":
    [
        {
            "name": "feature_attr",
            "parameter_type": "ATTRIBUTE",
            "value_limits":
            {
                "categorical":
                {
                    "categories":
                    [
                        "[ATTR_1]",
                        "[ATTR_2]",
                        "... [all input and non-input attributes]"
                    ]
                }
            },
            "default":
            [
                "ATTR_1",
                "ATTR_2",
                "... [five total default attributes]"
            ]
        },
        {
            "name": "drift_metric",
            "parameter_type": "STRING",
            "value_limits":
            {
                "categorical":
                {
                    "categories":
                    [
                        "PSI",
                        "KLDivergence",
                        "JSDivergence",
                        "HellingerDistance",
                        "HypothesisTest"
                    ]
                }
            },
            "default": ["PSI"]
        }
    ]
}
To create the above metric in one go, we’d simply include the endpoint and name fields from the first
request in the body and send use it to create the metric.
Alerts#
An alert is a message notifying you that something has occurred with your model. With alerts, Arthur makes it easy to provide a continuous view into your model by highlighting important changes in model performance.
An alert is triggered based on an alert rule, which you define using a metric and a threshold: when the metric crosses your threshold, the alert is activated. This alert can then be delivered to you via email, highlighted in the online Arthur UI, and/or accessed via integrations such as PagerDuty and Slack. You may include filters over your metric when defining an alert rule, and if your metric has parameters you can override the default values.
Default data drift alerts for Feature and Prediction Drift are automatically created for every feature once there is reference and inference data sent to Arthur. These alerts are created with dynamic threshold values specific to your reference dataset from the “data_drift” endpoint with “metric”: “Thresholds”.
The dedicated alerts endpoint is /models/{model_id}/alert_rules.
Create Alerts#
In addition to the default data drift alerts, we recommend creating custom alerts for your model. At a minimum, we highly recommend:
setting a lower-bound Inference Count alert to be notified if your prediction volume falls off
setting one model evaluation metric (e.g. accuracy or RMSE) if you have ground truth values
You may also consider setting some reasonable data bound metrics, especially over predicted values. For example, if you expect your classification model to predict the positive class about half the time, you might set alert rules to fire if that rate rises above 0.7 or below 0.3. Similarly, if you expect certain input fields to never have null values you might consider setting alerts if the number of null values rises above zero.
The parameters available in the API to create an alert rule are:
metric_id- UUID of the metric to use to create an alert rule.name- A name for the alert rule, a default will be generated if this is not supplied.bound- Either"upper"or"lower"threshold- Threshold of alert rulemetric_parameters- Values for any parameters the metric takes. Note that each parameter may only have a single value.filters- Filters to apply, to evaluate a metric over a subset of inferencesseverity- AlertRuleSeverity of the alert which gets triggered when the metric violates the threshold of the alert rule.lookback_period- For streaming models only. The lookback time or “window length” in minutes to use when calculating the alert rule metric. For example, a lookback period of 5 minutes for an alert rule on average prediction will calculate average prediction for the past 5 minutes in a rolling window format. This will default to 5 minutes.subsequent_alert_wait_time- For streaming models only. This is the time in minutes to wait after the most recent triggered alert before checking if the same alert is triggered. This defaults to 0.
Query Request:
{
    "metric_id": "<metric_id> [string]",
    "bound": "[upper|lower]",
    "threshold": "<threshold_value> [int|float]",
    "metric_parameters": "<metric_parameter_values> [object]",
    "filters": "<query_filters> [array[object]]",
    "severity": "[warning|critical]",
    "name [Optional]": "<alert_name> [string]",
    "lookback_period [Optional]": "<lookback_period> [int|float]",
    "subsequent_alert_wait_time [Optional]": "<lookback_period> [int|float]"
}
If using the SDK, you may call the create_alert_rule() method from your Arthur model.
Get Alerts#
Getting alerts returns a paginated list of rules for the model, and the GET endpoint includes query parameters,
as /models/{model_id}/alert_rules?page_size={page_size}&page={page}.
If using the SDK, you may call the get_alert_rules method from your Arthur model.
Update Alerts#
With the alert ID handy, you can send a PATCH request to /models/{model_id}/alert_rules/{alert_rule_id}.
bound- Either"upper"or"lower"threshold- Threshold of alert ruleseverity- AlertRuleSeverity of the alert which gets triggered when the metric violates the threshold of the alert rule.lookback_period- The lookback time or “window length” in minutes to use when calculating the alert rule metric. For example, a lookback period of 5 minutes for an alert rule on average prediction will calculate average prediction for the past 5 minutes in a rolling window format. This will default to 5 minutessubsequent_alert_wait_time- If metric continues to pass threshold this is the time in minutes to wait before triggering another alert. This defaults to 0. This does not need to be set for batch alerts.enabled- Whether or not an alert rule is active. Defaults to true.
Query Request:
{
    "bound [Optional]": "[upper|lower]",
    "threshold [Optional]": "<threshold_value> [int|float]",
    "severity [Optional]": "[warning|critical]",
    "name [Optional]": "<alert_name> [string]",
    "lookback_period [Optional]": "<lookback_period> [int|float]",
    "subsequent_alert_wait_time [Optional]": "<lookback_period> [int|float]",
    "enabled [Optional]": "<bool> [bool]"
}
Alert Notifications#
An Alert Notification is a way for Arthur to communicate the occurance of an alert to users. A specific Alert Notification Configuration determines if and where a notification should be sent when an alert on a specific model is triggered.
Arthur currently supports 3 types of alert notifications:
email
PagerDuty
ServiceNow
What is included in an Alert Notification?#
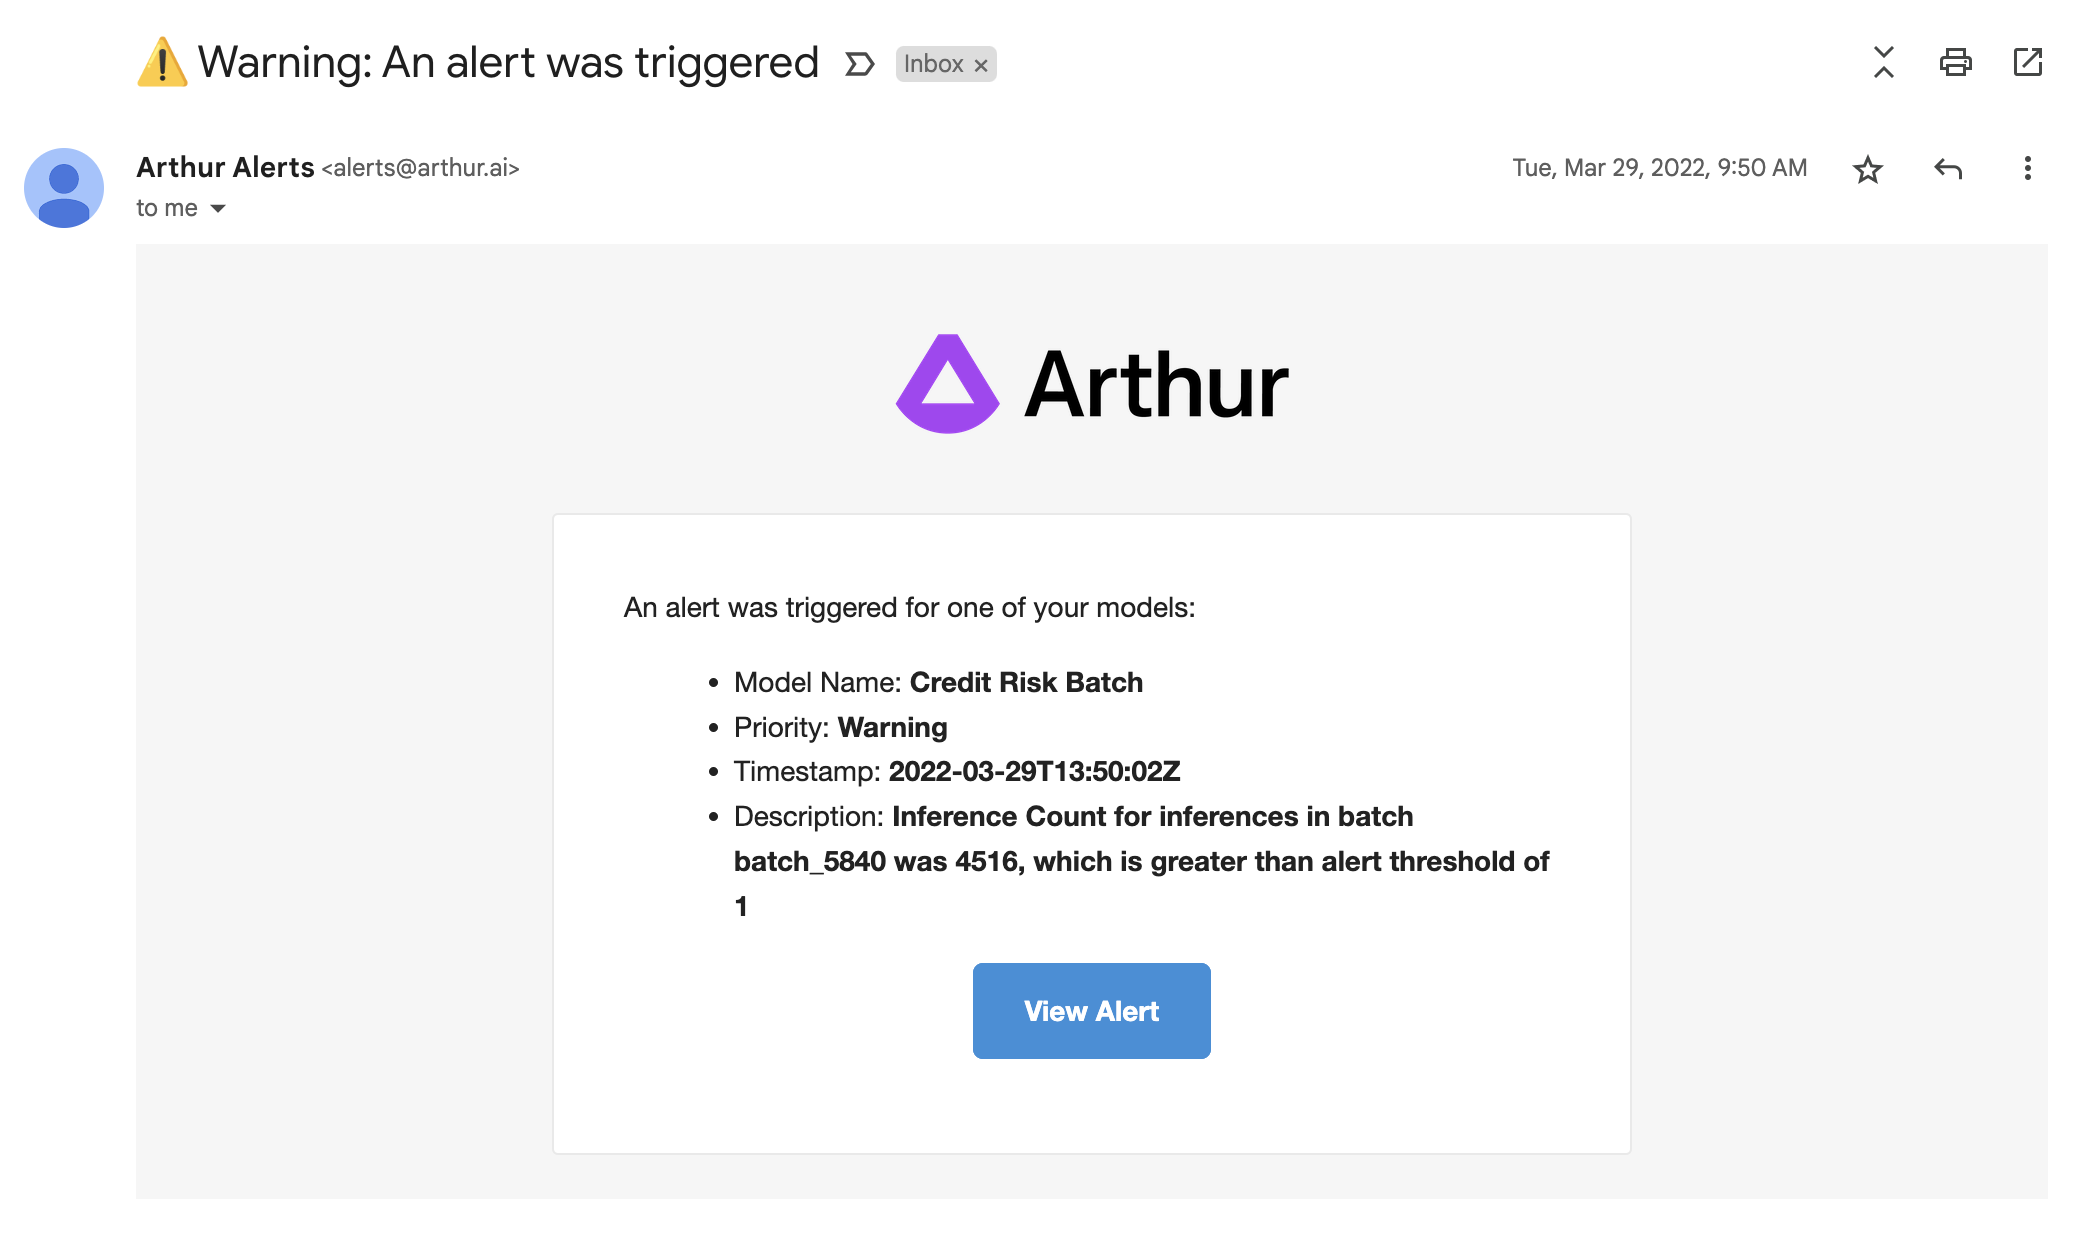
An Alert Notification contains the following information:
The model’s display name
The alert’s priority level (warning or critical)
The timestamp of when the alert was triggered
A short description of the alert which includes:
The metric name
The batch id or time range for which the metric was evaluated
The metric value that triggered the alert
The threshold
Here is an example alert notification sent via email:
Create Alert Notification Configuration#
To create an alert notification configuration, you can send a POST request to /alert_notification_configurations.
user_id- UUID of the user this alert notification configuration belongs to. Only specify if type is"email".model_id- UUID of the model this alert notification configuration belongs to.type- Type of notification to send, currently the only supported values are"email","PagerDuty", and"ServiceNow".destination- The email address to send the notification to.
If
typeis"email",destinationmust match the email address associated with the above specified user id’s Arthur account.If
typeis"PagerDuty",destinationshould be the PagerDuty provided integration email address. Please see our PagerDuty Integration Guide for more details.If
typeis"ServiceNow",destinationshould be the email address configured for integration with your ServiceNow instance. Please see our ServiceNow Integration Guide for more details.
enabled- Whether or not the notification configuration is enabled. Defaults to true.
Query Request:
{
    "user_id" : "<user_id> [string]" ,
    "model_id" : "<model_id> [string]",
    "type" : "[email]",
    "destination" : "<email> [string]",
    "enabled" : "<bool> [bool]"
}
Users can create configurations for themselves or must have at least a role of “Administrator” to create configurations that are not associated with their user id.
Get Alert Notification Configuration#
The GET endpoint returns a paginated list of alert notification configurations and includes query parameters,
as /alert_notification_configurations?model_id={model_id}&user_id{user_id}&page_size={page_size}&page={page}.
With a specific configuration ID handy, you can also send a GET request to /alert_notification_configurations/{configuration_id}.
Update Alert Notification Configuration#
With the specific configuration ID handy, you can send a PATCH request to /alert_notification_configurations/{configuration_id}.
The fields supported for update are:
enabled- Whether or not the notification configuration is enabled. If enabled, the destination address will be auto-notified when an alert is triggered.
Query Request:
{
    "enabled" : "<bool> [bool]"
}
Alert Summary#
An alert summary report in Arthur is an aggregated report that can be shared with members of your organization on some regular cadence. The report can be configured to control:
what models’ alert information is included in the report
who gets sent the report
how often the report gets generated
when the report gets sent out
Create Alert Summary Configuration#
To create an alert summary configuration, you can send a POST request to /alert_summary_configurations.
name- The user defined name of this alert summary configuration. Must be unique within the org.frequency- The cadence on which to send out the alert summary to subscribers. Supported values aredailyorweekly.send_day_of_week- The day of the week to send the alert summary to subscribers. Only required if frequency isweekly. Supported values are:Monday,Tuesday,Wednesday,Thursday,Friday,Saturday,Sunday.send_time_of_day- The time on a given day to send the alert summary to subscribers in the format “00:00”.models- list of model UUIDs that should be included in the alert summary reportsubscribers- Collection of alert summary subscribers that should be sent each generated report. For more information see alert summary subscriber.
Query Request Example:
{
  "name": "string",
  "frequency": "daily",
  "send_day_of_week": "Monday",
  "send_time_of_day": "09:00",
  "models": [
    "string"
  ],
  "subscribers": [
    {
      "type": "email",
      "destination": "string",
      "user_id": "string"
    }
  ]
}
Get Alert Summary Configuration#
The GET endpoint returns a paginated list of alert summary configurations, as /alert_summary_configurations?page_size={page_size}&page={page}.
With a specific configuration ID handy, you can also send a GET request to /alert_summary_configurations/{configuration_id}.
Update Alert Summary Configuration#
With the specific configuration ID handy, you can send a PATCH request to /alert_summary_configurations/{configuration_id}.
The fields supported for update via this endpoint are:
name- The user defined name of this alert summary configuration. Must be unique within the org.frequency- The cadence on which to send out the alert summary to subscribers. Supported values aredailyorweekly.send_day_of_week- The day of the week to send the alert summary to subscribers. Only required if frequency isweekly. Supported values are:Monday,Tuesday,Wednesday,Thursday,Friday,Saturday,Sunday.send_time_of_day- The time on a given day to send the alert summary to subscribers in the format “00:00”.models- list of model UUIDs that should be included in the alert summary report. Will replace the existing models configured for this report.enabled- Whether or not the alert summary report is enabled. If enabled, the alert summary report will be generated and sent out to subscribers as configured.
Query Request Example:
{
  "id": "418c6939-8765-40fa-b04e-11ba57b7f21c",
  "name": "string",
  "owner_user_id": "string",
  "organization_id": "7c60d51f-b44e-4682-87d6-449835ea4de6",
  "frequency": "daily",
  "send_day_of_week": "Monday",
  "send_time_of_day": "09:00",
  "models": [
    "string"
  ],
  "enabled": true
}
Who receives an Alert Summary Report ?#
A subscriber is someone who receives an alert summary report when it is generated. A subscriber can be configured using an Alert Summary Notification Configuration. A subscriber must be another user within your organization and they must be notified at the email address they used to register for Arthur.
Create Alert Summary Notification Configuration#
You can add a user as a subscriber for a specific alert summary report at the time of creating the alert summary configuration by including the alert notification configuration in the request body’s subscribers field.
With a specific configuration ID handy, you can also add a subscriber to an existing alert summary report using the POST /alert_summary_configurations/{configuration_id}/subscribers.
In either case, the alert summary notification configuration request contains the following fields:
type- must beemaildestination- If not provided, this will be auto-populated with the email address associated with the specifieduser_id. If provided, it must match the email address associated with the specifieduser_id.user_id- UUID of the user that will be subscribed to this alert summary report
{
  "type": "email",
  "destination": "string",
  "user_id": "string"
}
Get Alert Summary Notification Configuration#
The GET endpoint returns a paginated list of alert summary notifiaction configurations (aka subscribers) for a specific alert summar report, as /alert_summary_configurations/{configuration_id}/subscribers?page_size={page_size}&page={page}.
Update Alert Summary Notification Configuration#
With the specific Alert Summary Configuration ID and Subscriber ID handy, you can send a PATCH request to /alert_summary_configurations/{configuration_id}/subscribers/{subscriber_id}.
The fields supported for update are:
enabled- Whether or not the alert summary notification configuration is enabled. If enabled, the destination address will be auto-notified when an alert summary report is generated.
Query Request:
{
    "enabled" : "<bool> [bool]"
}